The complete guide · AI rendering
AI rendering for architects, explained properly.
What AI architectural rendering actually does, where it beats V-Ray, Lumion and outsourcing, where it goes wrong — and a workflow that gets a client-ready render of your own elevation in about a minute.
What is AI architectural rendering?
AI architectural rendering turns an image of your design — a SketchUp screenshot, a Revit or AutoCAD view, a clay model, even a hand sketch — into a photorealistic picture. Instead of modelling materials, placing lights and waiting for a render engine to trace rays, you give an image model your view plus a description of the look you want, and it paints a finished photograph around your geometry.
The best way to understand it is to see the input and the output side by side:
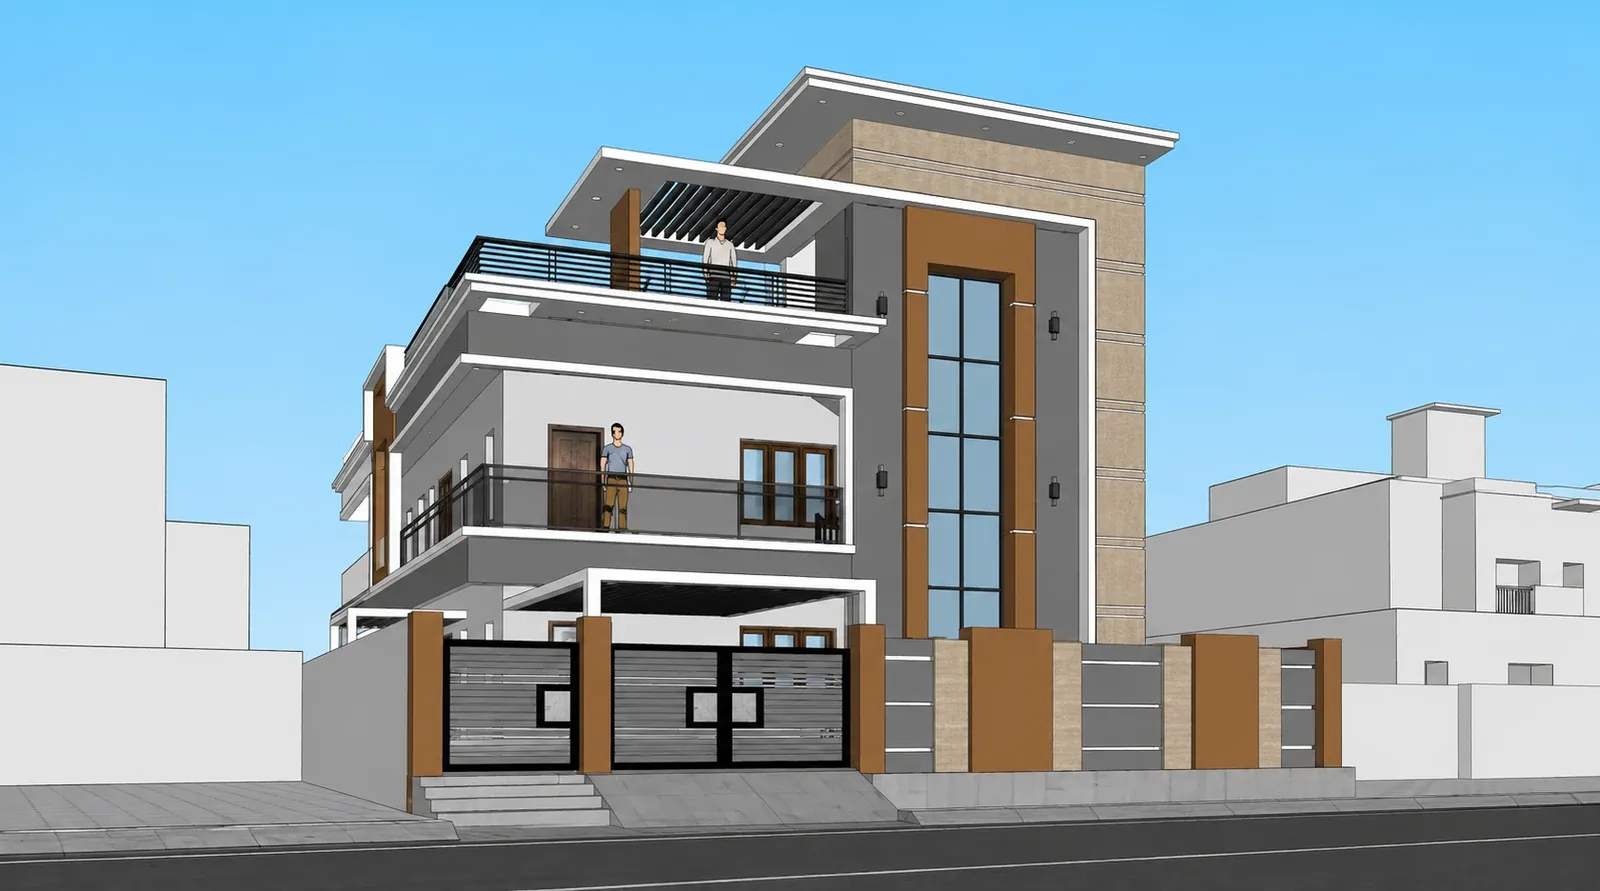
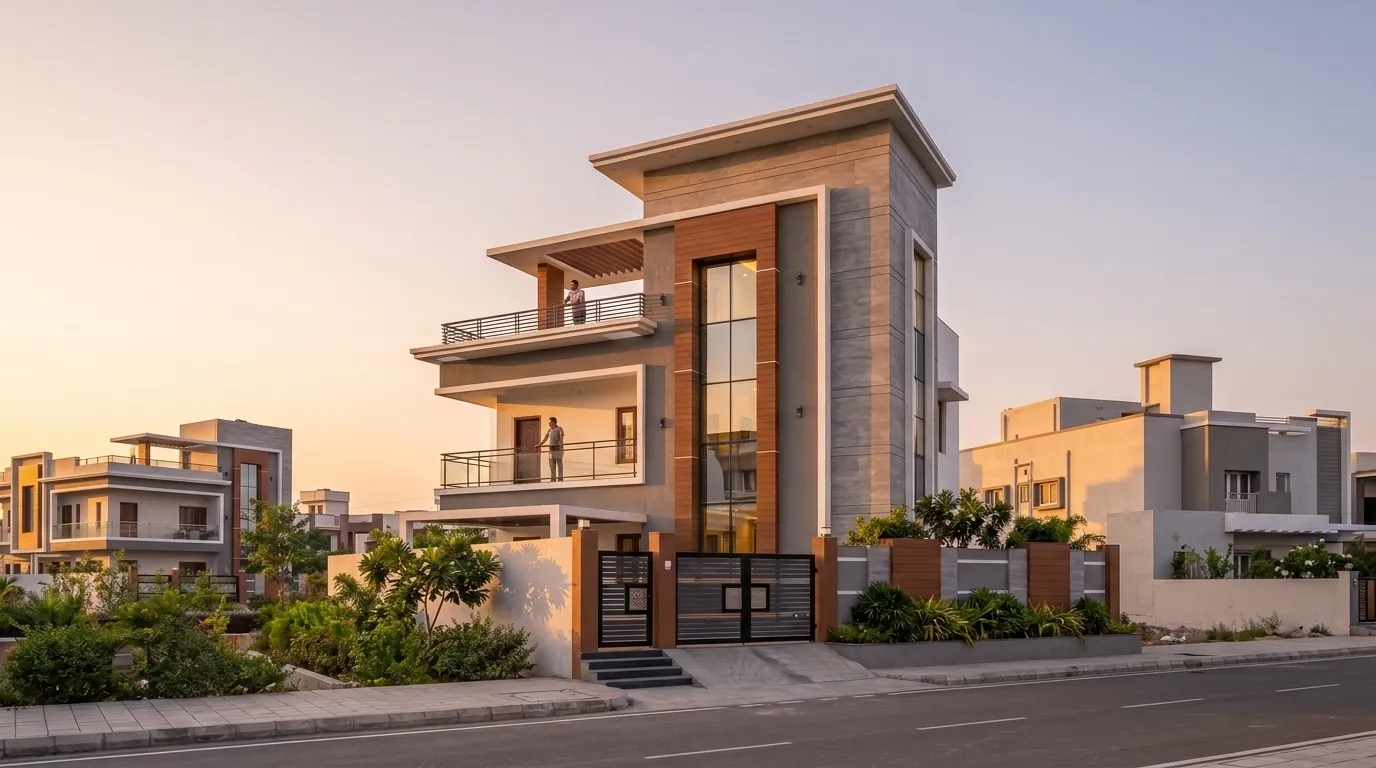
For architects and designers this changes three things at once: speed (a minute instead of hours or days), cost (tens of rupees instead of thousands) and who can render (anyone on the team, from any browser, without a GPU workstation).
How AI rendering works, step by step
Under the hood, an AI render follows the same pattern in every serious tool:
- You upload a source image. A screenshot of your 3D view is enough — textures are optional. The flatter and cleaner the view, the more room the AI has to add realism.
- You choose a look. In Visulixx that is two independent choices: a style (the world around the building — street, planting, neighbours, finish) and an atmosphere (light and weather — midday, golden hour, blue hour, monsoon, festival night).
- The model generates the image. It reads the edges and volumes of your view and paints a photograph that keeps them while adding materials, sky, shadows and context.
- The result is checked. This is where tools differ most. Visulixx runs Consistency Lock: a vision check compares the render with your drawing — window count and positions, floor lines, roofline, gate, plot — and quietly re-renders anything that drifted. Most consumer AI tools skip this step entirely.
- You refine. Re-render for a fresh variation, try a different style, change only the atmosphere, tweak one detail, or render other camera angles of the same scene.
AI rendering vs V-Ray, Lumion and outsourcing
AI rendering does not replace every other method — it replaces the slowest and most expensive part of early design communication. Here is how the routes compare for a typical Indian residential elevation:
| V-Ray / Lumion / D5 | Outsourced studio | Consumer AI (general image apps) | Visulixx | |
|---|---|---|---|---|
| Time per view | 3–6 hours incl. set-up | 3–7 days | 1–2 minutes | about a minute |
| Typical cost per view | ₹1,000–2,500 loaded (licence, GPU, operator time) | ₹3,000–12,000 | ₹100–300 | ₹62–80 |
| Needs a GPU workstation | Yes | No | No | No — any browser |
| Keeps your geometry | Yes — you modelled it | Yes | Often not — windows move, floors change | Checked on every render |
| Same world across angles | Manual set-up | Extra fee | Different every time | Lock world + shots |
| Best for | Final marketing stills, animation | Hero images with art direction | Mood boards | First meetings, design options, client approvals |
(Cost ranges are typical quotes we have seen on Indian residential projects in 2026; see the full rendering cost guide.)
Where AI rendering goes wrong (and how to spot it)
AI image models are trained to make beautiful pictures, not accurate ones. If nothing checks the output, you will eventually see one of these:
- Geometry drift — an extra floor, a window moved from one bay to another, a flat roof turned into a pitched one. Fatal for a client who will build exactly what you show them.
- Invented details — canopies, cornices, glass boxes or balcony extensions that are not in your drawing.
- Different world in every view — a front view on a palm-lined street, a side view in a pine forest. Clients notice.
- Hidden faces made up — when a camera turns to see a side your drawing never showed, the model has to invent it. Good tools keep invented faces plain; weak ones decorate them.
- Watermarks and licence limits — many free tiers watermark output or restrict commercial use.
What to look for in an AI rendering tool
When you compare tools — ours included — test them on your drawings, not their showcase images. Check:
- Geometry fidelity. Count the windows and floors in the output. Do it on three different buildings.
- Consistency across views and lights. Ask for a side view and a night version of the same render. Is it still the same street?
- Local context. Does a Hyderabad G+2 look like it belongs in an Indian street, or in a European suburb?
- Control without prompts. Can a junior get a good result by picking options, without learning prompt engineering?
- Output for real use. A4 for print sets, 16:9 for decks, 4:5 for Instagram, and a clean 4K upscale.
- Price per usable render — not per attempt. A cheap tool that needs five re-rolls is not cheap.
- Ownership and privacy. Commercial rights, no watermark on paid work, and no training on your drawings.
The Visulixx workflow in practice
This is the whole flow on a real project — a G+2 corner house drawn in SketchUp:
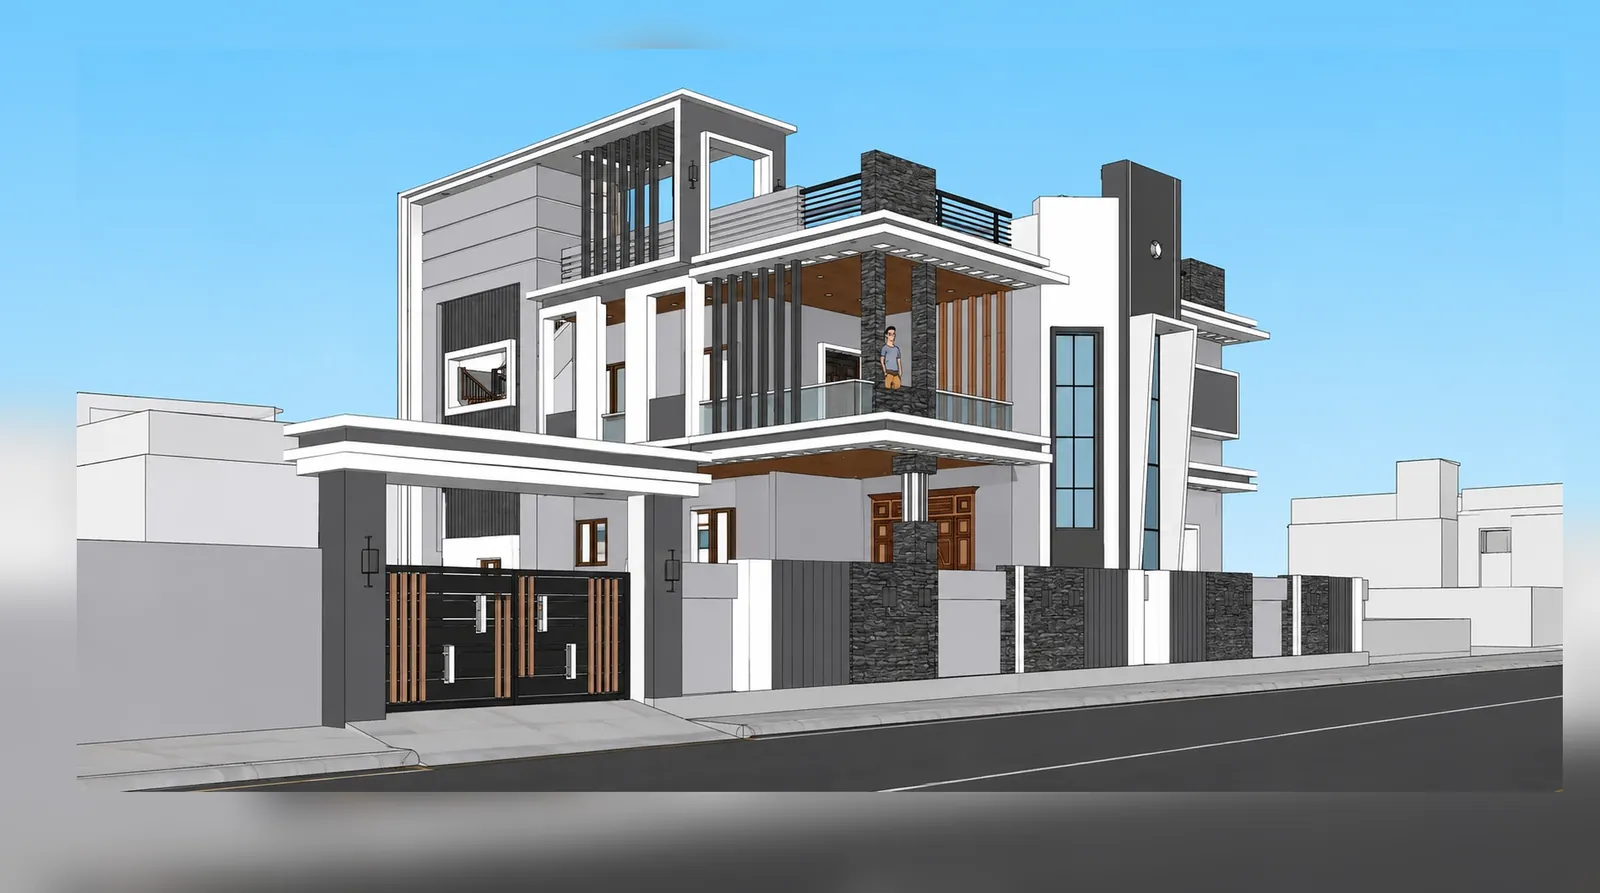
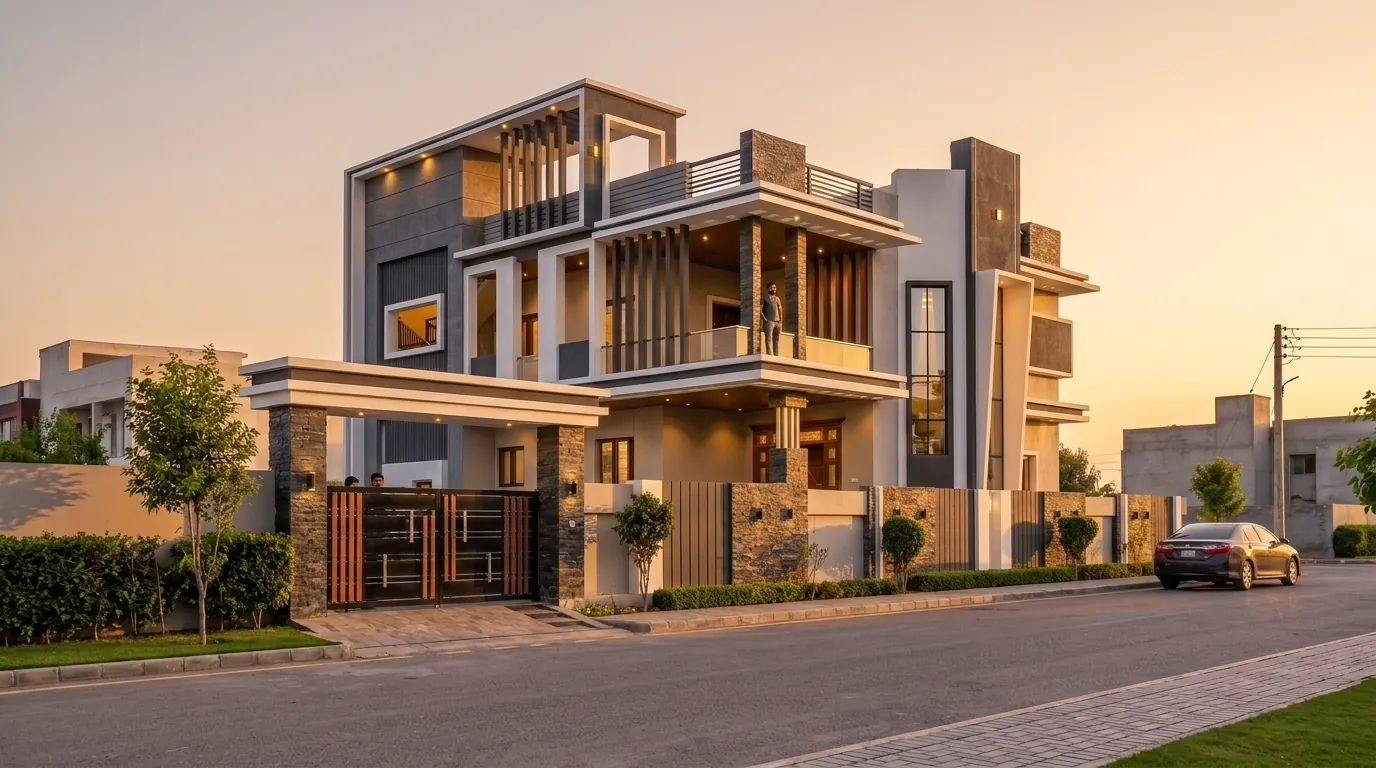
- Start a project — name it, add the client and building type, upload the view.
- Pick a style and atmosphere — 41 styles, 17 atmospheres, 12 aspect ratios including A4.
- Generate — about a minute, with Consistency Lock running automatically.
- Vary it — change only the light, keep everything else:
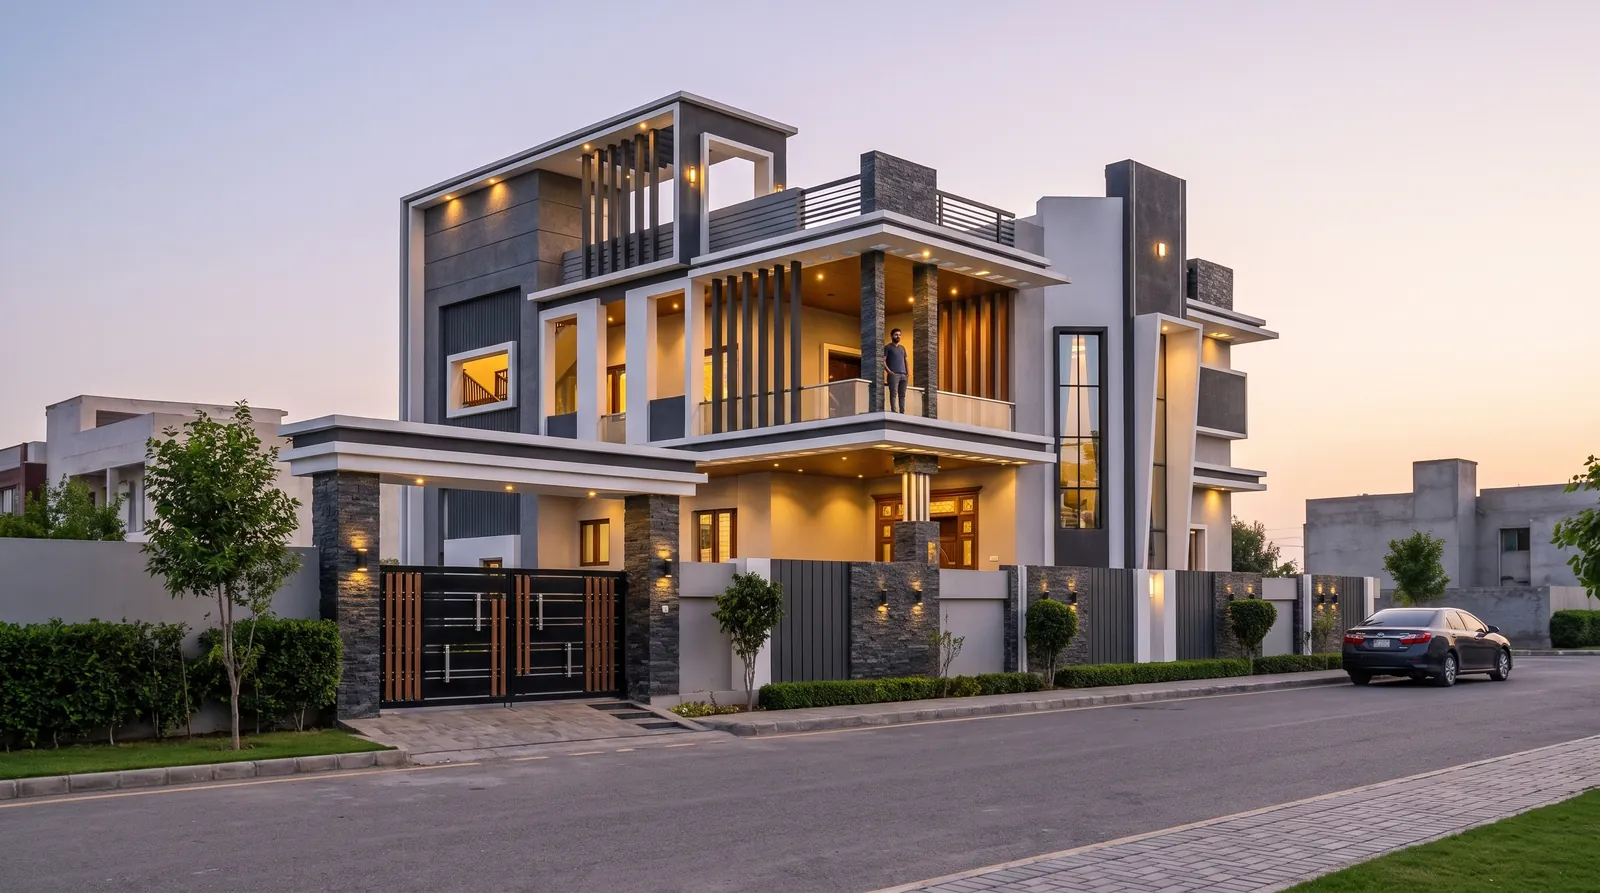
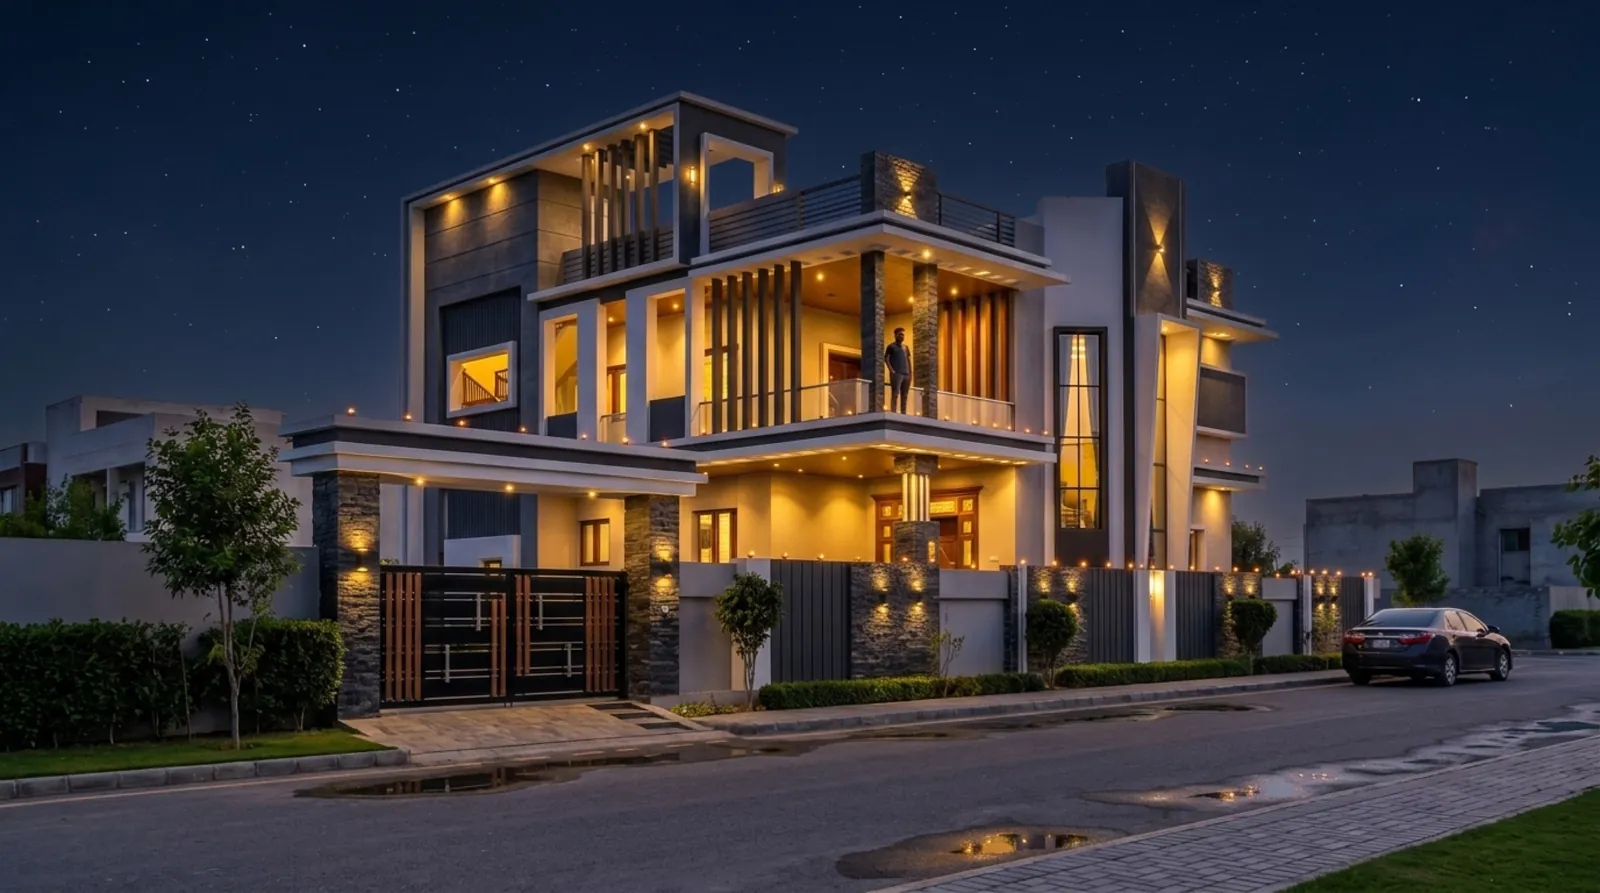
One render re-lit three ways. Building, street, trees and cars stay put — only the light changes.
- Lock the world and add angles — a low cinematic angle and a three-quarter view of the same street:
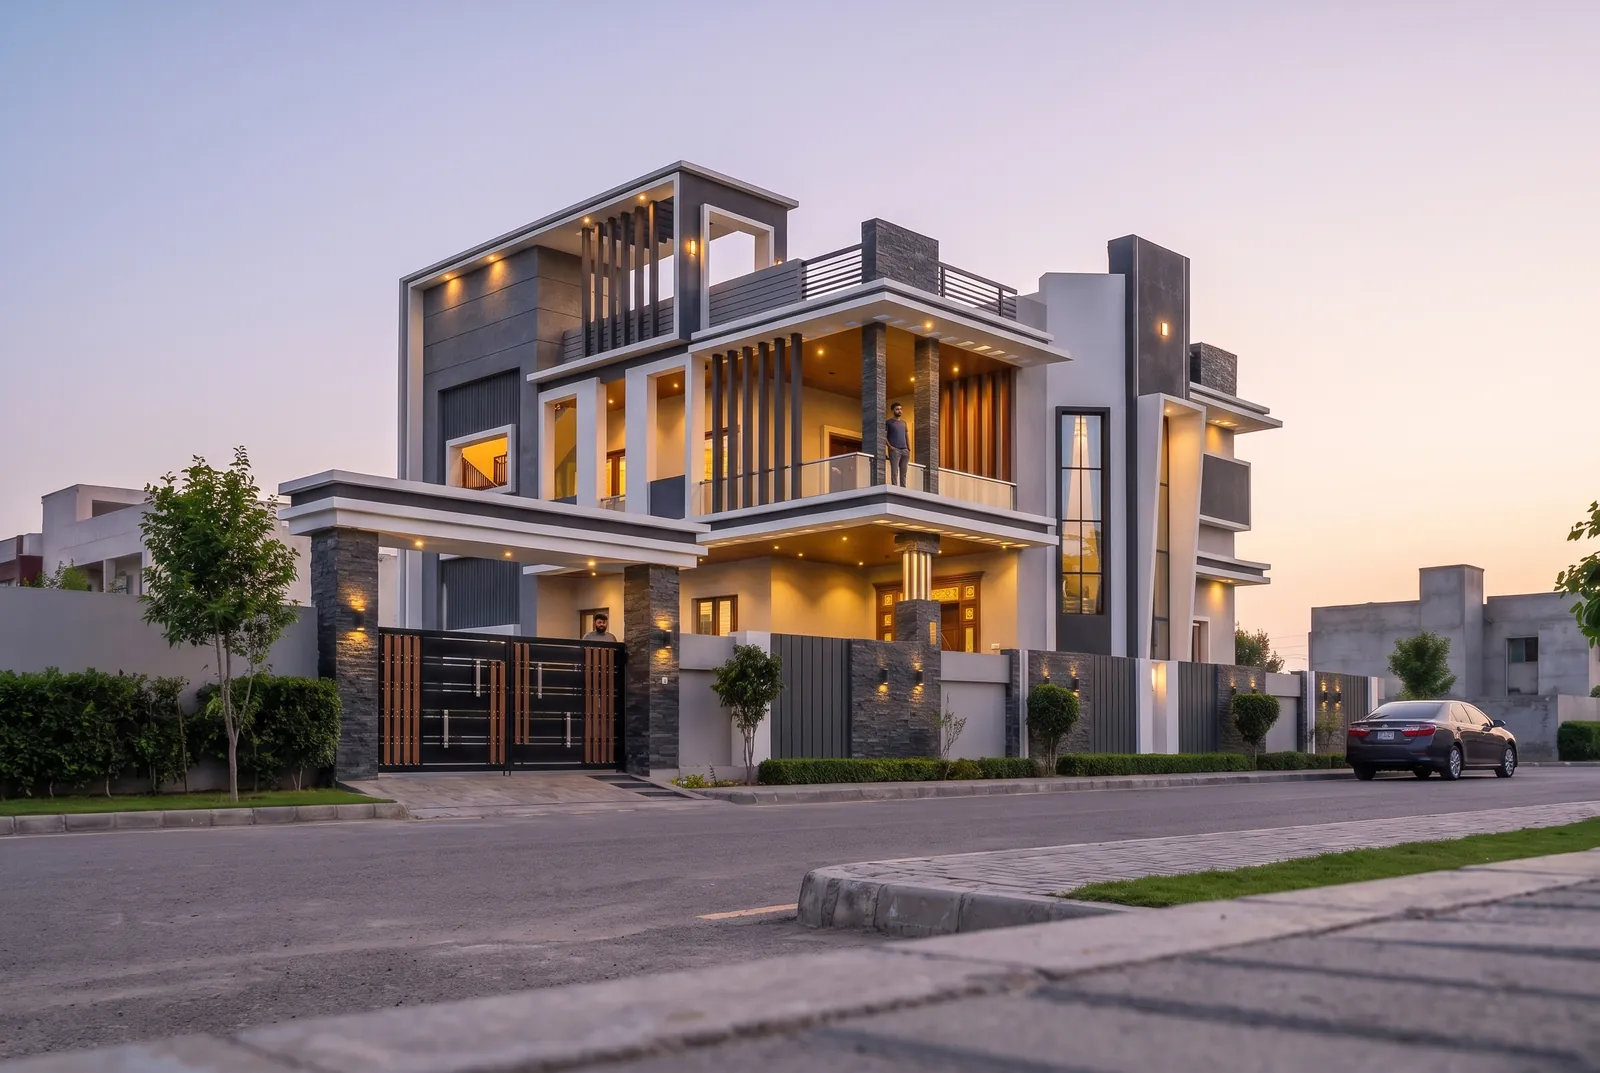
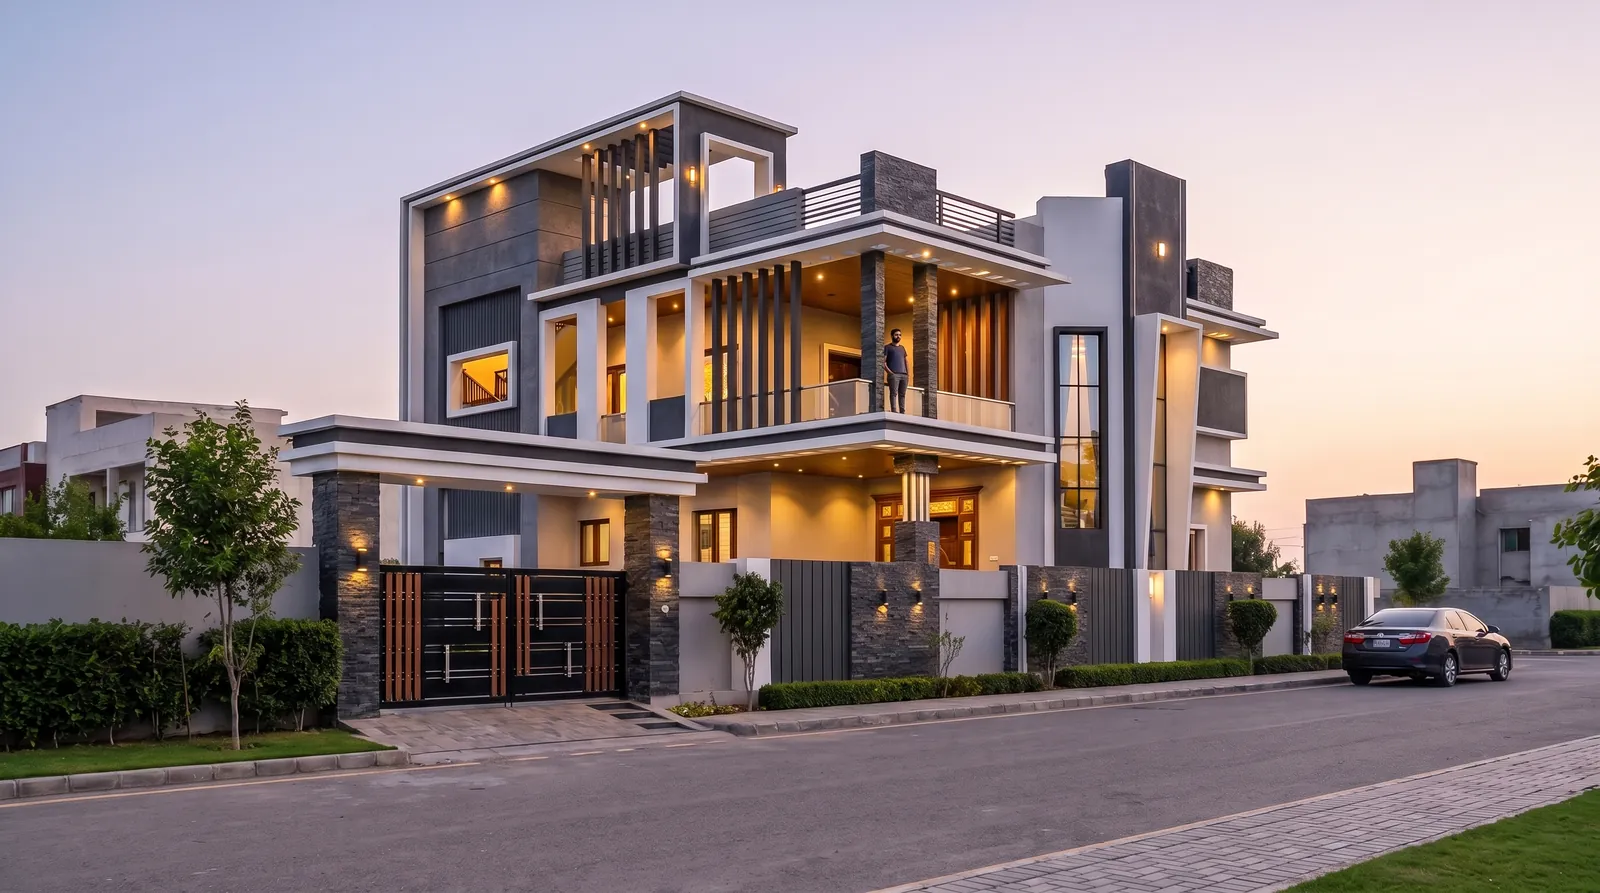
- Finish and deliver — adjust light, colour and crop in the editor, download, or upscale to 4K for print.
Try this workflow on one of your own elevations — 3 free renders.
Start free — 3 renders →How much does AI rendering cost?
Visulixx is pay-per-render: 3 free renders to start, then packs from ₹399 for 5 renders (₹80 each) down to ₹62 per render on the yearly plan, with top-ups from ₹99. No auto-renewal. A typical four-view client set with one round of revisions costs about ₹300–400 — less than a single outsourced view. Full details on the pricing page, and a side-by-side calculator in our India rendering cost guide.
Is AI rendering good enough for clients?
For concept presentations, design options, approvals, social media and pre-sales brochures — yes, and it is usually better than a rushed traditional render, because you can show five lights and three styles in the time one V-Ray view would take. For construction documents — no; a render is a visualisation, not a drawing. For hero marketing images with precise art direction, many studios now use AI for exploration and keep a traditional pipeline for the final one or two frames.
Getting started
- Export a clean view from your 3D app — our SketchUp to render guide has the exact settings.
- Upload it to Visulixx and render it in V-Real first; it reads your building and picks a fitting neighbourhood.
- Show the client two atmospheres of the same render — it is the fastest way to make a design feel real.
Browse real results in the elevation design gallery, or compare tools on our comparison page.
FAQ
Common questions
What is AI rendering in architecture?
AI rendering uses an image-generation model to turn a view of your design — a SketchUp screenshot, Revit or AutoCAD view, clay model or sketch — into a photorealistic picture with materials, light and surroundings, usually in under a minute.
Can AI rendering replace V-Ray or Lumion?
For concept presentations, options, approvals and social media, yes — it is far faster and cheaper. For animation and fully art-directed final stills, many studios still keep a traditional pipeline. AI rendering is best used early and often; traditional rendering for the last one or two hero frames.
Does AI change my design?
Many AI tools do: windows move, floors are added, roofs change. Visulixx checks every render against your source with Consistency Lock, re-renders anything that drifted and refunds renders it cannot verify.
What file do I need for AI rendering?
A PNG or JPG screenshot of your 3D view is enough. Textures are optional — clean, flat views often render best. See our SketchUp to render guide for export settings.
How much does AI architectural rendering cost in India?
Visulixx starts with 3 free renders, then ₹62–80 per render depending on the pack — compared with ₹3,000–12,000 per view from a rendering studio.
Can I render the same building from different angles?
Yes. In Visulixx, lock the world of a render you like and pick shots — front, side, three-quarter, close-ups, dusk, monsoon or night. Every shot keeps the same street, trees, cars and people.
Keep reading
Related guides
3 free renders · no card
Render your own elevation in about a minute.
Three free renders, no card. Upload a SketchUp, Revit or AutoCAD view and see it photoreal — checked against your drawing.